
First Look: Cooler Master MasterLiquid Pro 140
Disclosure: A review sample of this product was provided by CoolerMaster
Hot on the heels of their MasterLiquid Pro 120 and 240 all-in-one liquid CPU coolers, Cooler Master went back to the drawing board and improved upon some of the design features that left those in the hardware-centric/tech-tuber space wanting more. This redesign includes two larger models in 140mm and 280mm radiator sizes, as well as braided sleeved tubing from pump/block to the radiator. The new braided sleeved tubing will also be brought to the 120 and 240mm versions.
This particular version, is the MasterLiquid Pro 140 which will officially launch for general availability on November 29th, at an MSRP of $119.99 and will be available through Amazon.com, Newegg.com, Micro Center, and the Cooler Master CM Store

At the (literal) core of the MasterLiquid Pro series, is their FlowOp Technology that includes a dual chamber design pump with ultra fine microchannels, the braided sleeve tubing, square fin radiator design, and MasterFan Air Balance fans. The exclusive dual chamber design keeps heated coolant from decreasing the effectiveness of the coolant returning from the radiator. This design should also increase the overall life expectancy by over 2.5x, at 175,000 hours of operation. To that end, Cooler Master provides a five year warranty for the products in the MasterLiquid Pro series. Interesting note: this doesn’t require any supplementary power via 4-pin molex or SATA – it connects directly to your motherboard CPU Fan header and operates at a fixed speed.
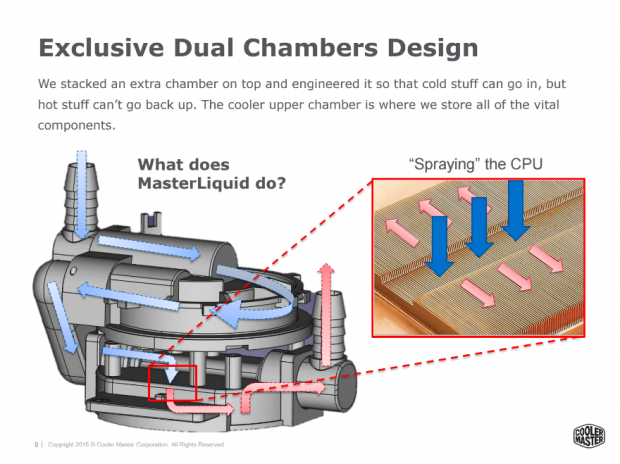
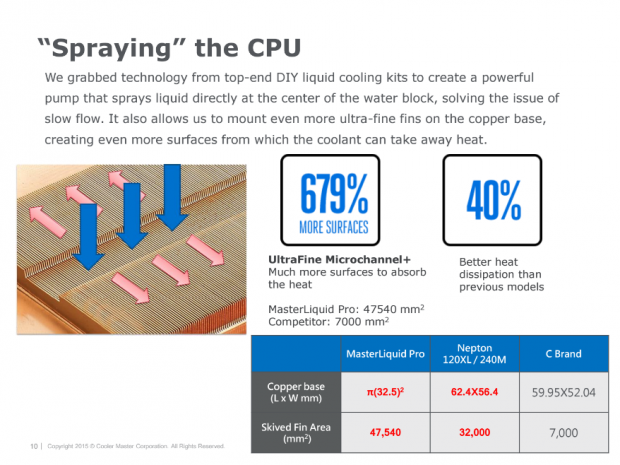
The CPU is sprayed along a central channel and the coolant is pushed across the block to the exterior through the “UltraFine Microchannel+” and out to the radiator. This is similar to the block and fin design of high end custom watercooling kits. Cooler Master notes that the use of these microchannels increases the surface area by 679%, and has 40% better heat dissipation than their previous generation Nepton models. The fin area of the MasterLiquid Pro series blocks is 47,540 square millimeters, compared to 32,000 on their Nepton series 120XL and 240M.
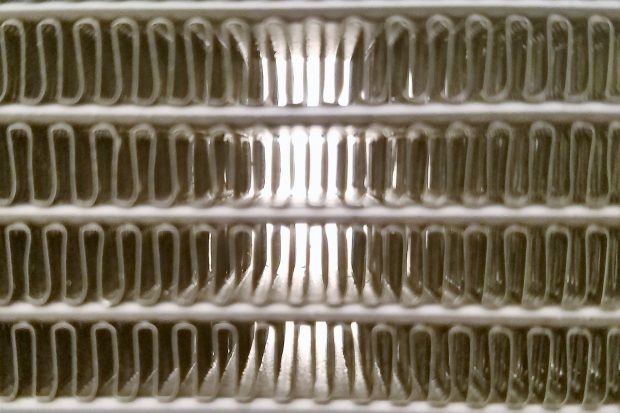
A new squared radiator fin design increases the contact points with channels and increases the overall surface area for heat absorption. Cooler Master has paired the radiator with two of their new MasterFan Pro 140 AP fans. These are not the high static pressure fans that you are used to with competitor radiators – they run quieter and push air farther. There are three settings on the motor – S (for Silent), Q (for Quiet) and P (for Performance). For this first look, I accepted all defaults and left it on silent. These can be configured to operate in either push or pull – in my testing I operated with an open bench – your mileage and preference may vary. The MasterFan Pro 140 AP fans operate between 650-2800RPM (in Performance mode), and push 64.21 cubic feet per minute.
These fans attach to the radiator with rubberized corners, and if you didn’t think that was enough, Cooler Master included two rubber gaskets to install between the fans and radiator. All of that dampening pays off and significantly reduces noise and case vibration even at the fans highest speeds.
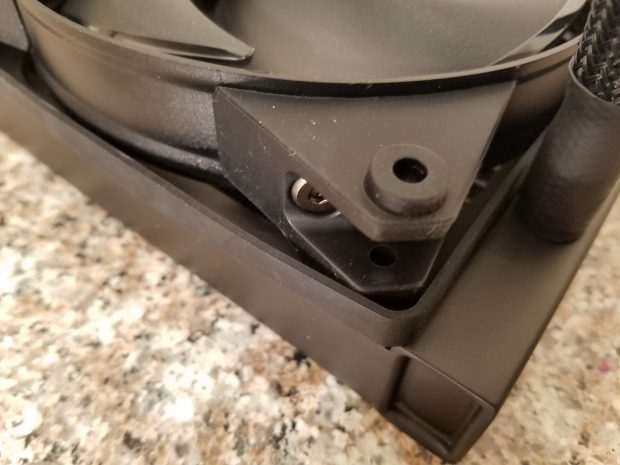
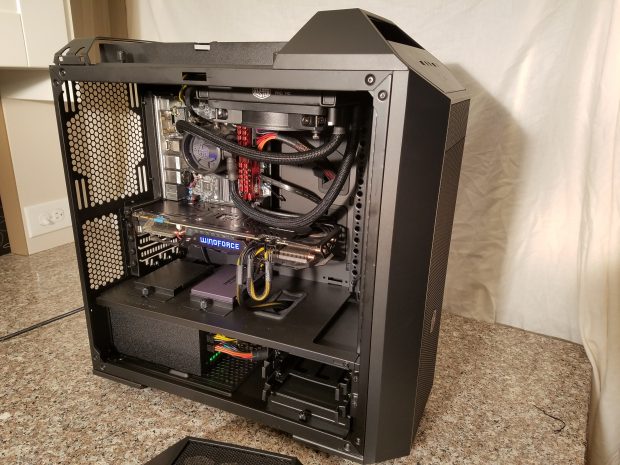
Assembly of the unit was straightforward and instructions were clear. As typical with off the shelf cooling kits, there are brackets and screws corresponding to both Intel and AMDs socket designs – I installed this on both an LGA2011 socket (X99 test bench) as well as on an LGA1150 socket (Z97 for picture gallery) and found the process to be very straightforward. On X99, four posts connect to the integrated socket, the appropriate bracket is mounted to the pump block assembly with four screws, and the bracket connects to the posts with four locking nuts. On LGA 115X boards, a universal backplate with posts that pass through the motherboard are connected similarly to the pump block assembly bracket and locking nuts.
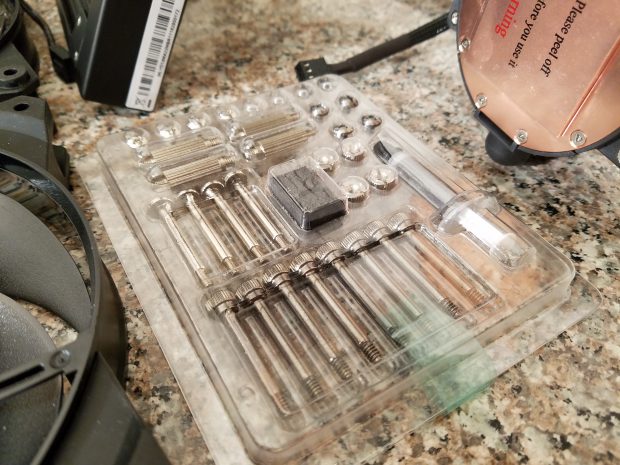
I was impressed at how simple it was to assemble the unit with the provided long thumbscrews – I’ve experienced frustration with other AIO kits in the past with mounting the case to the radiator to the fan, or the radiator to the fan to the case. CoolerMaster made it easy – assemble your fans and radiator, use provided screws to connect to the thumbscrews holding the fans.

In true KBMOD fashion, none of my testing was done in a vacuum. This was done in my real house, with real conditions, and in real workloads. Ambient temperature in my work area was 70F, or 21.11C. Ambient noise level was in the 46-48 decibel range.
I started with my “daily driver” Intel i7-5930K @ 4.5ghz (36×125) which typically resides under a competitor’s 280mm AIO cooler, and unfortunately had to dial it back slightly to 4.25ghz (34×125) as it failed the AIDA64 Stability Test at 4.5ghz and shut down at 88C. Ouch. With a more reasonable ask for a 140mm radiator, I saw much more reasonable numbers on a 30 minute run:

If you’re not able to view the interactive chart (on Mobile in particular) please click this link to imgur
Unfortunately I didn’t have another 140mm AIO closed loop liquid cooler available for testing – at this point in time all I only have 240 and 280mm units available. I did put my Corsair H110i GTX through the same battery of tests, and while the results may seem unfair, it should provide some context as to how well the CoolerMaster Liquid Pro 140 performed with half the total radiator size, in a push/pull configuration.
What this all boils down to (a temperature pun – you’re welcome) is a solid AIO cooling solution particularly for small-footprint chassis. This is yet another fine product in Cooler Master’s expanding Master series, and the name befits the product. It’s well positioned from a price perspective, and carries an excellent warranty. This particular unit should be on your radar if you’re looking to make the move from a large air cooler, or if you’re looking to move to a smaller build (mITX perhaps?).
Bonus pictures can be viewed in this album.
Make sure to follow @CoolerMaster and @CoolerMasterNA on Twitter. Like their Facebook page here.
Summary: