

>Keepin’ it Cool: CPU edition
>A critical component of your PC is most likely taken completely for granted: your CPU heat-sink and fan. It does an adequate job, sure. You’ve run it constantly for a couple years now, maybe you’ve cleaned it once or twice with a can of compressed air, but you’ve never really given it much of a second thought. You’ve ignored the fact that it’s the one item that has kept your PC from dying from a horrible, horrible self-induced heat stroke.
Okay, maybe that’s not the case if you’re a PC enthusiast like me. You’ve put a bit of consideration in to it, and have selected a highly rated air-cooled system to keep your temps nice and low despite the abuse you throw at your multi-core processor. But have you ever considered water cooling? I had, many times. Water cooling systems were always tremendously expensive and complicated. They were risky business – they could easily leak and destroy your baby in a matter of seconds – far faster than you had time to react.
Thermal conductivity is the name of the game. It’s all about displacing heat from the cores of your CPU to… somewhere else. In a traditional heatsink and fan combination, the surface area of the heatsink shares the intense heat from the CPU across its fins, where circulating air (via the fan) dissipates it in to the ambient air. This is where air flow in your case becomes important. Without a source of cool (room temperature air) being drawn in, and warm air dissipated from the HS/F being expelled by another fan, the ambient temp of your case will simply continue to rise and diminish the results of your HS/F.
TDP or Thermal Design Power (sometimes called Thermal Design Point) is an important thing to consider when purchasing a cooling solution for your PC. Your processor manufacturer will provide a TDP rating which reflects stock (non-overclocked) heat generation. For example, my newly acquired Intel Q9400 (thanks John!) has a Max TDP rated at 95W.
I’m going to ignore a couple of the more extreme cooling methods, notably Liquid Nitrogen. Yes, it’s possible and people have set world speed records with it. It’s unrealistic, expensive, dangerous, and unreliable. It’s not for the every-day gamer. It’s for booting your PC up once at a ridiculously high clock, running a benchmark, and shutting it back down. Do something more enjoyable with your liquid nitrogen, like freezing marshmallows.
That being said, let’s go over the main cooling options available at our disposal:
Traditional Heatsink/Fan Air Cooling
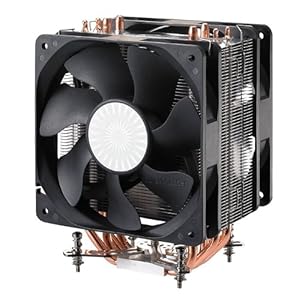
As I mentioned before, this is your standard design. It is typically used by OEMs, and is packaged with your CPU if you had purchased a retail package. They consist of a large block with fins, mounted directly on top of the CPU. There are passive (fanless) and active cooling solutions available. In an active cooling solution the fan is typically mounted directly on top – some designs use a side mounted fan such as in the photo below:

HeatPipe Heatsink/Fan Air Cooling
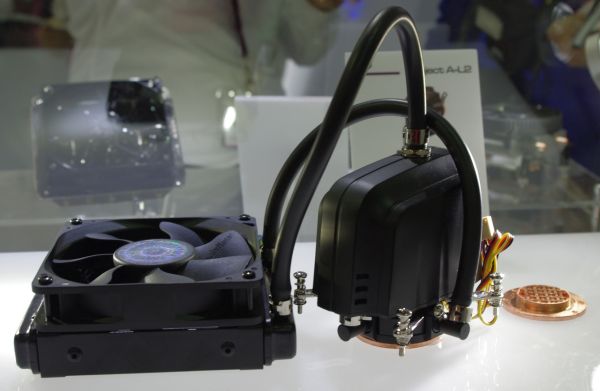
Water/Liquid Cooling
Not for the faint of heart, or those likely to half-ass a project. Tom’s Hardware has an excellent beginner’s guide to water cooling, which I won’t expand on greatly. I’ll defer to their knowledge of the subject. These are difficult, complicated, time consuming, and most importantly dangerous. There are a few off-the-shelf Water Cooling systems which can be purchased, but most water cooling enthusiasts will purchase the parts separately and assemble it themselves. These systems include a water-block, pump, radiator, fans, and reservoir. These systems can also be extended to cool your GPU(s), and chipset for those who may feel intrepid enough. If you ever plan on moving your PC, I would advise against this.

Thermoelectric/Peltier Cooling
What the hell is a Peltier, you may ask? This is a device which creates a thermoelectric effect. The Peltier effect is when a current (electricity) flows through a junction of two materials, top and bottom, where heat is absorbed at the lower junction, and heat is generated at the upper junction.
In layman terms, it is a solid state heat pump which transfers heat from one side of the device to the other with consumption of electricity. Peltiers do not have moving parts, or circulating liquids. Peltier plates must be used in conjunction with another cooling method, as their only use is to draw heat away (usually at an astonishing rate) from the top of the processor. Properly built and calibrated, a peltier can bring temperatures well below your rooms ambient temperature.
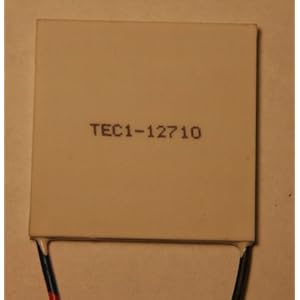
I would advise you to EXTENSIVELY RESEARCH this option before proceeding. Product pages should give you the maximum TDP. For example, I quickly found this TEC1-12710 Thermoelectrics Cooler 100W -154W Max Peltier on Amazon
Immersion/Mineral Oil Cooling
You’ve seen the youtube videos, I’m sure. Aquarium PCs galore. This is a fad cooling solution which reared its ugly head. They encourage people to dunk their motherboards (along with the rest of your components) in a tank of mineral oil without any proper circulation or reservoir. What happens when it gets too hot? You turn it off and let it sit, or you replace the mineral oil. No thanks. In short, please don’t try this at home. Ever.
While it looks cool (pun intended) the truth is that if you want an effective one, you have to drop a disgusting amount of money. Anyone can dip a PC in mineral oil and neglect to properly dissipate the heat, but if you want to do it right, you have to basically copy cat this design reviewed by Maximum PC. We’re talking around $4k to $10k from Hardcore.

Wrap up: What suits my needs?
Well that’s the million dollar question, isn’t it? for 99% of you out there, Heat Pipe design will suit you well. It’s inexpensive, highly effective, and durable. Personally I purchased the Cooler Master Hyper 212+ as noted above. I’ve been very interested in the self contained hybrid systems, and depending on price, one might find it’s way in to my next gaming PC.


2 Responses to >Keepin’ it Cool: CPU edition